This is a guide thoroughly lays out standards for testing and verification for our lightscripts. Read this carefully and follow each step to the letter.
For the final effect checklist, see here: https://signalrgb.atlassian.net/wiki/spaces/LD/pages/105414657/Effect+Release+Checklist
Lightscript Basics
A LightScript is a basic webpage that uses the HTML canvas library to create effects. They range from very simple (Color Shift) to very complicated (Fractals, Multiverse) in terms of code and control complexity. For an effect to pass, we need every control to work in every situation, and we need a clean console. Also, pay attention to the actual effect and note anything that seems off, even if the effect does not freeze or crash. The next few images will give you a quick understanding of what we are looking at here:

↑ This is what SignalRGB looks like when you have an effect loaded, in this case Multiverse.
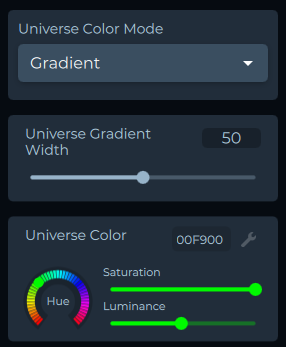
↑ On the right side, you can see individual user controls. From top to bottom, we have a combo box, a numeric slider, and a color picker.
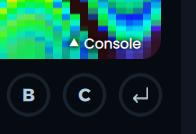
↑ The console can be seen by clicking the "Console" arrow here.
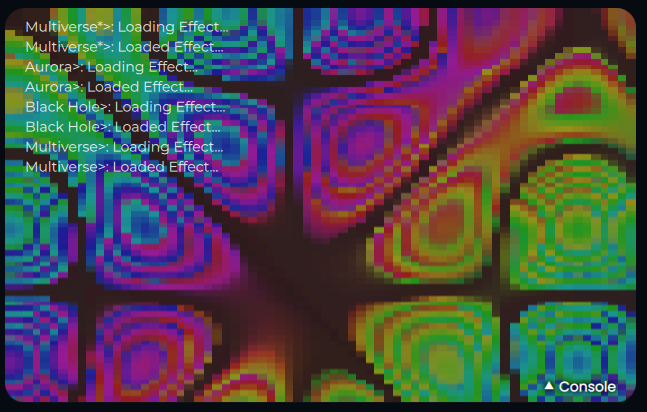
↑ Here, you can see the console open, with logs visible.
All Controls Need to Work Perfectly
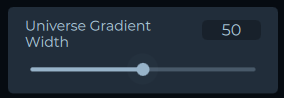
Sliders
Controls a numerical range. Ideally, every slider should range from 0 to 100 unless it's impossible to integrate this into the code. It's important to test each possible value in the slider, as it may control speed, scale, amount of screen elements, etc. Faults are most likely to occur at the extreme ends of the slider (0 or 100), but they can happen anywhere, especially if there are interacting elements in the effect.
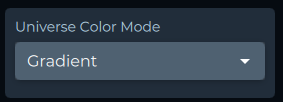
Lists
Allows you to pick from a pre-set list of choices. They are most commonly used for color palettes in an effect, although they have many other uses. Each choice must work in every situation. For example, if there is a general speed slider and a list that changes the animation being displayed, each animation must be tested with every value of the speed slider. This also applies to any other control that interacts with the list choices.
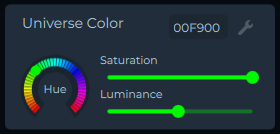
Color Pickers
Each color picker controls three values: hue, saturation, and lightness. Each one needs to be tested to its full extent. If the description for the control does not clearly indicate what it changes, make a note. If the hue slider does not display the full spectrum of colors, also note that. Some color pickers will only apply to the "Custom" color palette, or only to background elements, or only to toggled elements, so pay attention.
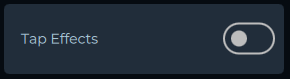
Toggles
These are simple on-off switches. The most common toggles will control our "Tap Effects," which react to a user's keystrokes. Make sure the control description is clear and that it works.
The Console is Clear of Logs and Errors
If the effect is crashing, you will see an error in the console. Note the error and the line at which it occurs. We also need to remove all logs from the code, so if you see any logs besides "Loading Effect," make a note of it.
Update the Effect Notes in Developer Hub
Go to https://signalrgb.atlassian.net/wiki/spaces/LD/pages/edit-v2/5275668
The top section lists all accounts and their login info. Below it is a chart listing all game integrations. Below that is a chart listing all non-integration effects. The far-right column in both charts is the notes section. Write down every issue you have found in the non-integration effect section and color-code the note section based on urgency.
- Green means all working.
- Yellow means some issues but does not crash.
- Red means the effect crashes.
Game Integration Instructions
Game integration testing is a long, precise process. Every effect must be tested on every resolution that we support. This means that in a game with 10 effects, if the game offers 10 resolutions, you will have to test 100 effects before you are done. This is not negotiable.
Step 1
Download the game onto your computer. All game accounts can be found at https://signalrgb.atlassian.net/wiki/spaces/LD/pages/6684677/Game+Accounts. If you can't find an account, talk to Cub.
Step 2
Make sure that your monitor is set to the resolution you are testing. This is mandatory. If I open a game and set its resolution to 2560x1440, and my monitor is set to 4k resolution, the integration will see the 4k resolution. Both the game and monitor must be set to the same resolution to accurately test that resolution.
Each time you set your monitor resolution, take a screenshot that includes the resolution plus the time and date displayed on your computer. Then, take a screenshot of the in-game resolution setting. Save these screenshots for later.
Step 3
Choose the effect you will be testing. Effect descriptions can be found at https://docs.google.com/spreadsheets/d/1Ft8ezKdKAZQXToxcpVA9sLaFNN5wc4nab2hu7XH-VNo/edit#gid=275801353.
Each integration contains a list of toggles that will turn each effect on and off. Each time, make sure that you turn off every effect except for the one you are testing. Verify that the effect triggers when performing the action in-game.
If it triggers 80% of the time, it is considered working, but we always want to improve on that if possible. Make sure that the effect does not falsely trigger. This will involve running your character through multiple environments and menu screens like dialogue or inventory.
Check dark areas, light areas, colorful areas. Jump and dodge, fire your weapons, perform actions-everything that can be done. Do this each time you test, for every effect, on every resolution.
Make notes for effects that do not trigger or falsely trigger, ensuring you include the resolution and situation in which the effect breaks.
Step 4
Turn on every effect and play the game. Make sure that you complete one full game mode, quest, adventure-whatever the game involves. At this point, take another screenshot of the general in-game UI and save it for later. This step is to verify there are no false triggers and ensure the effects work in a typical gameplay setting. Take notes for any issues and include the resolution you are testing on.
Step 5
Once you have finished testing every effect in one resolution, repeat steps 2-4 in every resolution that the game provides. Our goal is to support every possible resolution for every game with an integration. Note resolutions that do not work; you will be helping us to expand our support for the game.
Step 6
Organize all screenshots in a .zip file following this folder structure: GameName > Resolution > SDR and HDR, placing the corresponding images in each folder. Any notes or observations should be sent directly to Cub via Slack. Also, note the total amount of time it took to test each integration. We will not ask you to justify every second worked, but we do need you to be thorough, so do not rush through this testing. Just check every box and follow each step in an orderly manner.
Once organized, send the final .zip to Cub for review.