Enabling the component system in your plugin comes in 2 stages.
- Enabling the component UI
- Grabbing color values from user selected components
Plugin Setup
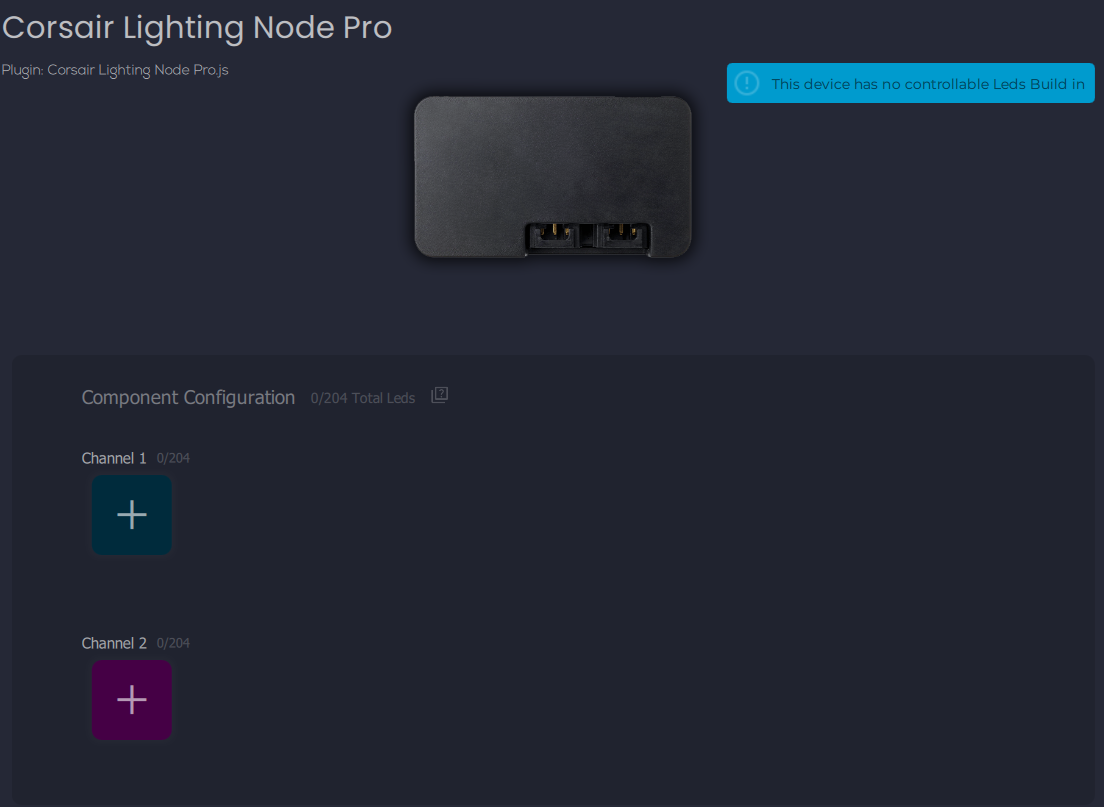
The initial step to enable the component UI is to define the device channels for SignalRGB. We're going to use the Corsair Node Pro as an example here. Begin by making an array to outline what our channels look like, then we'll send them over to SignalRGB's backend in the initialize function so they get created before we start trying to render anything.
xxxxxxxxxxconst DeviceMaxLedLimit = 204;//Channel Name, Led Limitvar ChannelArray = [ ["Channel 1", 204], ["Channel 2", 204],] function SetupChannels(){ device.SetLedLimit(DeviceMaxLedLimit); for(let i = 0; i < ChannelArray.length; i++){ device.addChannel(ChannelArray[i][0],ChannelArray[i][1]); }}In the above code you'll see we're laying out a 2D array for our channels, with each entry being the channel's name then its LED limit. Down in SetupChannels() we're going to set the total LED limit, then iteratively call device.addChannel for each entry in our array.
This loop can also be executed directly without the array if you want to hardcode it.
xxxxxxxxxxfunction SetupChannels(){ device.SetLedLimit(204); device.addChannel("Channel 1",204); device.addChannel("Channel 2",204);}Call the SetupChannels function inside of Initialize to finish device initialization.
xxxxxxxxxxexport function Initialize(){ SetupChannels()}Save the file changes and you'll have your channels appearing on the device page. Next, we'll dig into getting color values from selected components.
Getting Full Channel Colors
After setting up the channels we'll need to grab colors from them - this is where saving the channel names into an array comes in handy.
The general idea is that:
For each channel -> For each Component on the Channel -> getColors()
This is all encapsulated into the device.channel().getColors() function for you. The Corsair Node Pro sends it's color data in one channel at a time, so we'll want to have the data kept 'separate' for us to make it easy.
You'll notice one extra piece here though: we're checking for the LedCount() of the Channel and if it returns 0 were going to pulse the channels for the user. This is a nice indicator for them to know they need to set up the channels.
Below you'll find the code examples for a normal use case, hardcoded, and without the channel pulse checks.
xxxxxxxxxxfunction SendChannel(Channel){ let ChannelLedCount = device.channel(ChannelArray[Channel][0]).LedCount(); let ColorData = [] if(device.getLedCount() == 0){ ChannelLedCount = 80; let pulseColor = device.getChannelPulseColor(ChannelArray[Channel][0], ChannelLedCount); ColorData = device.createColorArray(pulseColor, ChannelLedCount, "Seperate"); }else{ ColorData = device.channel(ChannelArray[Channel][0]).getColors("Seperate"); } let RedChannelData = ColorData[0] let GreenChannelData = ColorData[1] let BlueChannelData = ColorData[2] //...}Lastly we'll want to just call this function in the render loop. The bottom of the SendChannel function contains the code to convert the color arrays into packets and send them to the device. That will be device specific and for you to reverse engineer yourself!
xxxxxxxxxxexport function Render(){ SendChannel(0); device.pause(1); SendChannel(1); device.pause(1); SubmitLightingColors();}Interacting with individual Components
Some devices are weird and break the mold, or maybe you're trying to do something novel in your plugin and need to interact with individual components. In these cases we can't use device.channel().getColors() and instead need to loop through individual components ourselves.
For this we'll be using device.channel().getComponentNames() to get all of the component IDs, then iterate through them using device.channel().getComponentColors() to get individual color arrays.
The below example just concatenates the individual arrays together, but you can do anything you need with them in between.
xxxxxxxxxxlet components = device.channel("Channel 1").getComponentNames(); for(let i = 0; i < components.length;i++){ let ComponentColors = device.channel("Channel 1").getComponentColors(components[i]); RGBData = RGBData.concat(ComponentColors) }If you need to get really into the weeds in your plugin you can use device.channel.getComponent()